

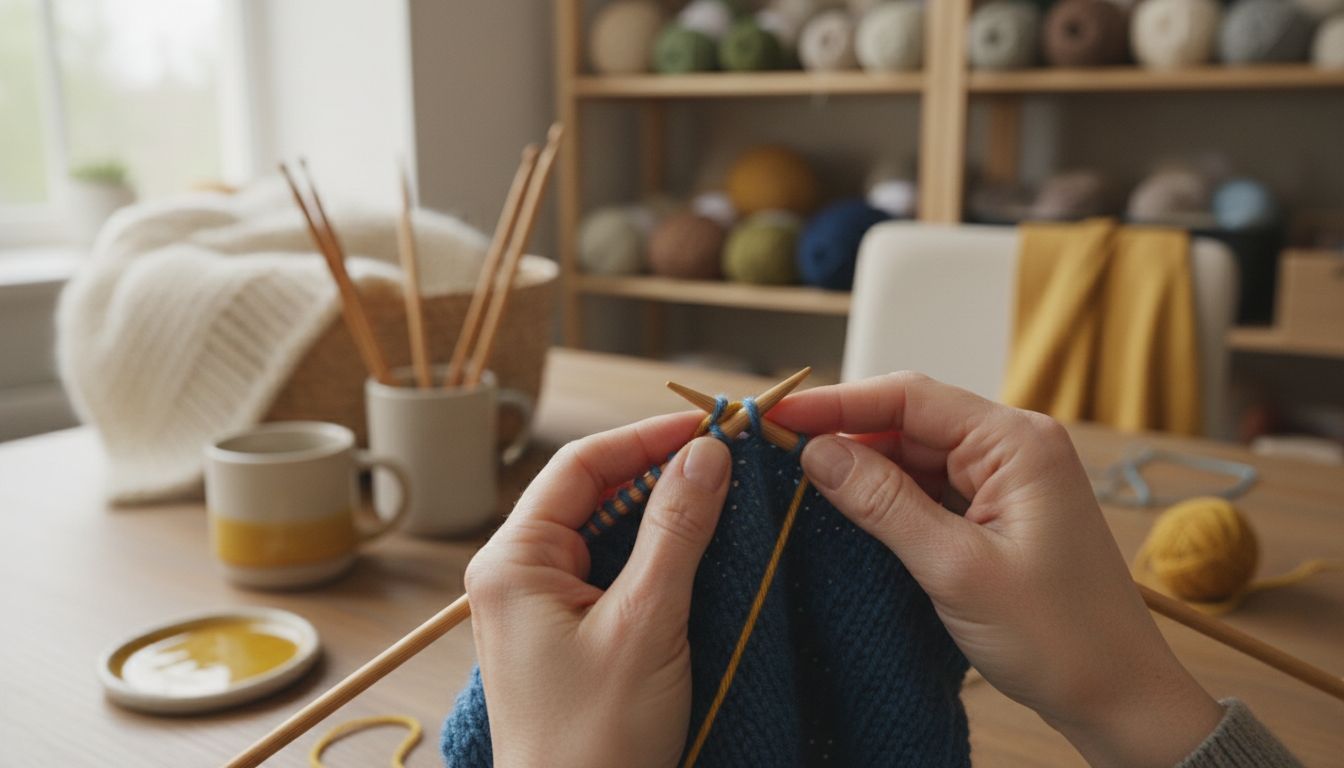
How to Change Yarn Colors Seamlessly for Crochet and Knitting
More than 60 percent of american crafters say changing yarn colors cleanly is one of their top challenges in crochet and knitting. Even experienced hands can struggle with keeping transitions smooth and frustration free. Learning the right preparation and finishing techniques means your projects will look neat and professional every time. This step by step guide makes sure you can change colors confidently and create polished work that stands out.
Table of Contents
- Step 1: Gather Materials And Prepare Your Project
- Step 2: Finish Current Yarn Before Color Transition
- Step 3: Join New Yarn Color Securely
- Step 4: Weave In And Secure Loose Ends
- Step 5: Check Color Change For Smoothness
Quick Summary
| Important Insight | Practical Application |
|---|---|
| 1. Gather all necessary materials | Assemble multiple yarn colors, scissors, and needles before starting to ensure smooth transitions. |
| 2. Finish your row before changing | Complete your current row up to the last stitch for a seamless color change without gaps. |
| 3. Securely join new yarn color | Use a slip knot and leave enough tail ends for a strong, stable connection during the transition. |
| 4. Weave in loose ends carefully | Use a compatible yarn needle to weave ends and secure them without distorting the fabric. |
| 5. Inspect color transitions thoroughly | Review transitions under good lighting, checking tension and stitch alignment for a polished look. |
Step 1: Gather Materials and Prepare Your Project
Changing yarn colors seamlessly requires careful preparation and the right tools. Before diving into your crochet or knitting project, you will need to assemble a few essential materials that will help you transition colors smoothly and professionally.
First, gather your primary supplies including multiple yarn colors in the same weight and fiber content, sharp scissors, a yarn needle for weaving in ends, and stitch markers. Pro tip: Choose yarns from the same brand or collection to ensure consistent texture and color compatibility. When selecting your yarns, pay special attention to the weight and fiber composition to maintain uniform tension and appearance across color changes.
Preparing your workspace is just as critical as selecting your materials. Lay out all your yarns and tools on a clean, well-lit surface where you can easily track your progress. Having a yarn project organization guide nearby can help you keep everything tidy and accessible during your crafting session. Keep your workspace organized to minimize tangling and make the color transition process smoother and more enjoyable.
Before beginning your color change, practice your preferred technique a few times on a small swatch. This allows you to test different methods and find the most seamless approach for your specific project. Your goal is to create nearly invisible transitions that look intentional and professional.
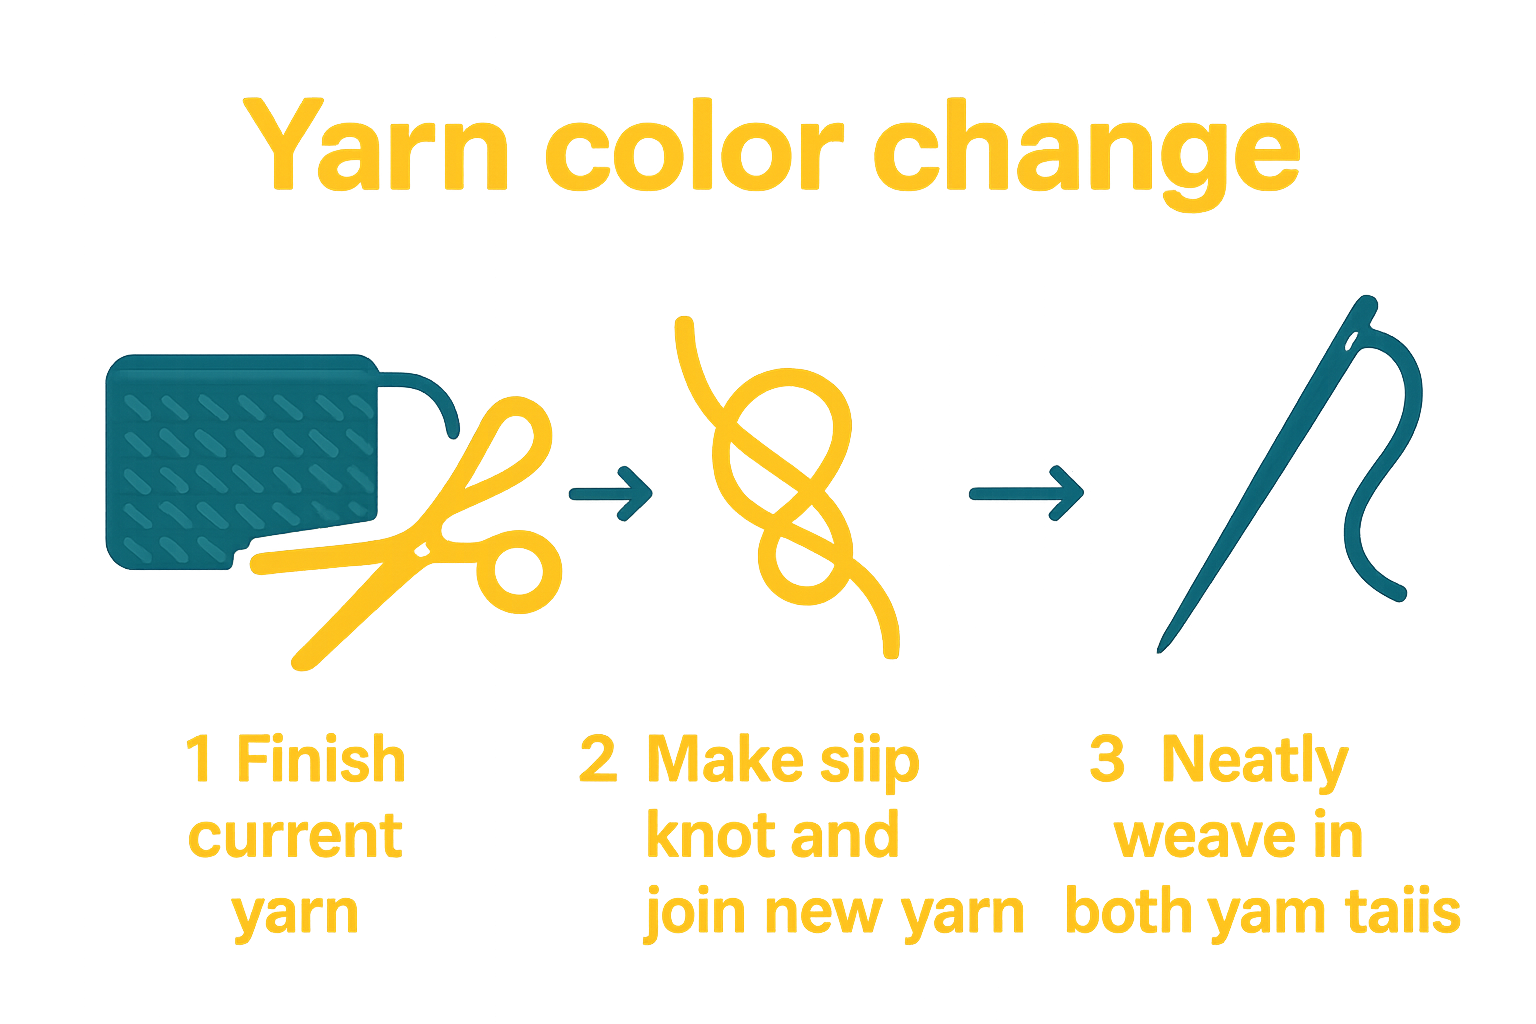
Step 2: Finish Current Yarn Before Color Transition
Preparing to change yarn colors requires a strategic approach to ensure a clean and professional looking project. Understanding how to properly complete your current yarn segment is crucial for creating seamless color transitions in your crochet or knitting work.
To begin, complete your current row or round using the existing yarn color until you reach the last stitch. When you have only one loop remaining on your hook or needle, stop and do not complete the final stitch. This strategic pause allows you to introduce the new yarn color smoothly and securely. For those working on more complex color transition techniques, understanding colorwork crochet basics can provide additional insights into managing multiple yarn colors effectively.
If you are working with multiple skeins or transitioning between different yarn batches, take a moment to alternate your skeins to prevent noticeable color variations. This technique helps maintain consistent color and texture throughout your project, especially when working with hand dyed or variegated yarns. Leave a tail of approximately 6 inches from both the old and new yarn colors to allow for secure weaving and joining later in your project.
Prepare yourself mentally for the color transition by checking your tension and ensuring that the new yarn matches the weight and gauge of your existing work. A smooth color change depends not just on technique but also on maintaining consistent stitch tension and yarn characteristics.
Step 3: Join New Yarn Color Securely
Joining a new yarn color requires precision and technique to maintain the professional appearance of your crochet or knitting project. The goal is to create a seamless transition that looks intentional and maintains the structural integrity of your work.
To join the new yarn color, start by creating a slip knot with the new yarn approximately 6 inches from the end. Insert this slip knot onto your hook or needle, positioning it right next to the last stitch of your previous color. Essential colorwork tips recommend leaving long yarn tails on both the old and new colors to facilitate secure weaving and minimize potential unraveling. Pull the new yarn through the last loop of the previous color, effectively completing the color transition.
When working with complex color patterns, consider the aesthetic and structural implications of your join. If you are creating intricate designs, exploring stunning yarn color combinations can help you make informed choices about color placement and transition techniques. Ensure that you maintain consistent tension during the color change to prevent visible gaps or irregularities in your stitching.
After completing the initial join, take a moment to gently tug both yarn ends to confirm the connection is secure.
 This simple step will help prevent unexpected unraveling and ensure your color transition remains stable throughout your crafting project.
Step 4: Weave in and Secure Loose Ends
Successfully changing yarn colors requires meticulous attention to finishing techniques that will keep your project looking professional and polished. Weaving in loose ends is a critical step that prevents unraveling and ensures the durability of your crochet or knitting work.
To begin weaving in your loose yarn ends, select a yarn needle that matches the thickness of your yarn. Master crochet finishing techniques recommend threading the loose yarn tail through the needle and carefully weaving it through the back side of your stitches. Work in different directions to distribute the yarn tail and prevent any potential bulging or visible lines. Aim to weave through approximately 3 to 4 inches of stitches to create a secure anchor.
Pay special attention to the tension while weaving. Too tight, and you might distort the fabric texture. Too loose, and the end might work its way free over time. The key is to find a balanced approach that secures the yarn without compromising the overall appearance of your project. After weaving, gently trim the remaining yarn tail close to the fabric surface, leaving just a tiny 1 4 inch remnant to prevent future unraveling.
Once you have woven in all loose ends, take a moment to inspect your work from both the front and back sides. Ensure no yarn tails are protruding and that the color transitions look smooth and intentional. Your careful finishing work will make the difference between a handmade project that looks amateurish and one that appears professionally crafted.
Step 5: Check Color Change for Smoothness
After completing your yarn color transition, a careful and systematic review is essential to ensure a professional looking result. This final inspection step will help you catch any potential imperfections and maintain the overall quality of your crochet or knitting project.
Start by examining the color transition area under good lighting conditions. Hold your project up and view it from different angles to identify any unexpected variations in tension, color blending, or stitch alignment. Essential tips for colorwork crochet patterns recommend paying close attention to the junction where your yarn colors meet, looking for any visible gaps or irregular stitching that might disrupt the smooth flow of your design.
Run your fingers gently along the color transition area to feel for any unexpected bumps or tension changes. Sometimes visual inspection alone might miss subtle irregularities that can be detected through touch. If you notice any slight imperfections, you can often correct them by carefully adjusting the surrounding stitches or gently blocking your work to even out the texture.
Remember that minor variations are normal in handcrafted projects and can actually add character to your work. The goal is not absolute perfection but a smooth, intentional looking transition that showcases your crafting skill and attention to detail.
Master Seamless Yarn Color Changes with Quality Tools and Support
Changing yarn colors seamlessly can be challenging without the right materials and techniques. Whether you struggle with keeping tension consistent or worry about secure joins and neat finishing your project deserves yarn that works perfectly together. At Craftiss you will find premium yarns carefully selected to match weight and texture helping you create flawless transitions every time.
.png)
Explore our extensive Yarn collection designed for smooth color blending and uniform stitch appearance. Plus check out Craftiss for crafting essentials that support your creativity from start to finish. Don’t let frustration interrupt your passion take action today and bring your colorful crochet and knitting ideas to life with confidence.
Frequently Asked Questions
How do I prepare my materials for changing yarn colors?
To prepare your materials for changing yarn colors, gather multiple yarn colors that are the same weight and fiber content, sharp scissors, a yarn needle, and stitch markers. Ensure everything is organized on a clean surface to make the transition process smoother.
What should I do before I change yarn colors in my project?
Before changing yarn colors, finish your current row or round and leave one loop of the last stitch on your hook. This pause allows for a seamless introduction of the new color without disrupting your stitching pattern.
How do I properly join a new yarn color when crocheting or knitting?
To join a new yarn color, create a slip knot with the new yarn and place it next to the last stitch of your previous color. Pull the new yarn through the last loop to complete the transition smoothly, ensuring both ends are secure.
What is the best way to weave in loose ends after changing yarn colors?
Weave in loose ends by using a yarn needle to thread the yarn tail through the back side of your stitches, covering about 3 to 4 inches. This technique helps anchor the ends securely while keeping the fabric smooth and free of protrusions.
How can I check if my color transition looks smooth after changing yarn colors?
Inspect the color transition area under good lighting, and check for any gaps, mismatched tension, or irregular stitches. Running your fingers along the transition can help identify any bumps, which you can correct by adjusting surrounding stitches.
Should I use different yarn brands when changing colors?
It’s best to use yarns from the same brand or collection to ensure consistent texture and color compatibility. This will help maintain uniform tension and appearance across your project.
Recommended
- Understanding Why Alternate Skeins Matters in Knitting – CRAFTISS
- 8 Inspiring Crochet Color Combinations for Your Projects – CRAFTISS
- How to crochet with yarn: your ultimate beginner’s guide to mastering – CRAFTISS
- 7 Stunning Yarn Color Combinations You Must Try – CRAFTISS


