Master Crochet Finishing Techniques Guide for Perfect Projects

Crochet finishing can make or break the look of your handmade project and it is often where beginners get stuck. Most people think it is just about snipping a loose thread or adding a last row, but that barely scratches the surface. A project with the right finishing can last for years and even survive dozens of washes. Turns out, the secret to a flawless finish comes down to a few tools and techniques that almost nobody talks about.
Table of Contents
- Step 1: Gather Your Finishing Supplies
- Step 2: Secure Loose Ends Effectively
- Step 3: Join Pieces Smoothly
- Step 4: Apply Edging For A Polished Look
- Step 5: Block Your Finished Piece For Perfection
Quick Summary
| Key Point | Explanation |
|---|---|
| 1. Gather essential finishing supplies | Prepare scissors, yarn needles, and blocking materials to ensure a professional-looking finish for your crochet project. |
| 2. Secure loose ends with care | Weave loose ends through the back of stitches to prevent unraveling and ensure a clean look in your finished piece. |
| 3. Join crochet pieces smoothly | Use appropriate joining techniques like slip stitching or mattress stitching to create seamless connections between pieces. |
| 4. Apply edging for a polished look | Choose an appropriate edging technique to enhance the final appearance and structure of your crochet project. |
| 5. Block your finished piece effectively | Use blocking to shape and set your project, giving it a polished appearance and helping to maintain its form. |
Step 1: Gather Your Finishing Supplies
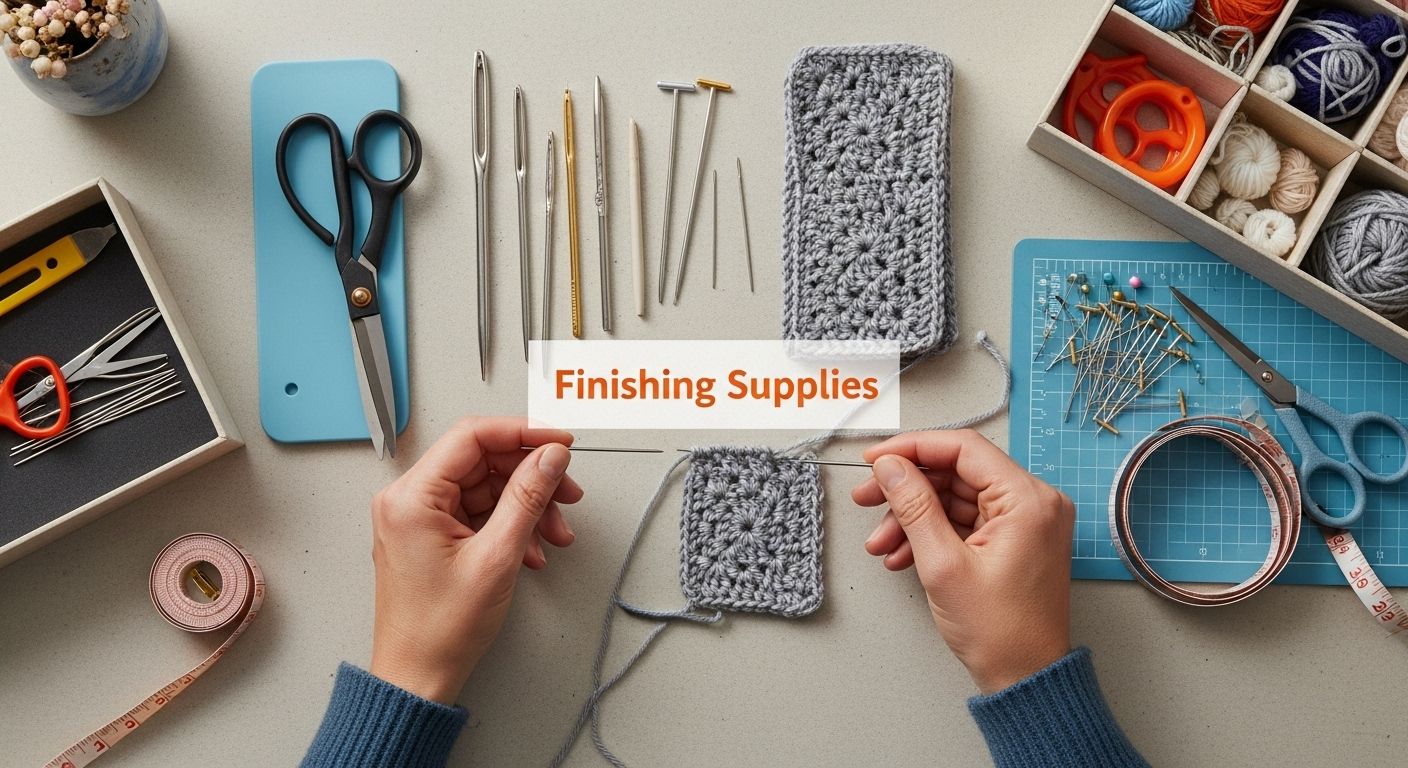
Mastering crochet finishing techniques starts with having the right tools and supplies at your fingertips. This critical first step ensures you are fully prepared to transform your handmade project from a raw work in progress to a polished, professional-looking piece. Proper preparation prevents poor performance, and in the world of crochet, your finishing supplies are your secret weapons.
To begin, you’ll want to assemble a comprehensive finishing kit that includes several essential tools. Scissors are perhaps the most fundamental item in your arsenal. Choose sharp, precise fabric scissors that can cleanly cut yarn without fraying or damaging delicate fibers. Craft scissors with a comfortable grip will make your cutting tasks easier and more precise. Next, invest in a yarn needle specifically designed for weaving in loose ends. These blunt-tipped needles are typically made of metal or plastic and come in various sizes to accommodate different yarn weights.
Your finishing toolkit should also include blocking materials, which are crucial for achieving a professional look. This includes blocking mats (foam interlocking squares work wonderfully), rust-proof pins, a spray bottle for light moisture, and a measuring tape to ensure consistent dimensions. If you’re working with natural fibers like wool or cotton, these blocking tools will help you shape your project perfectly, smoothing out any irregular stitches and setting the final form.
Learn essential beginner crochet techniques that complement your finishing skills. Additional helpful items include stitch markers for tracking progress, a crochet hook matching your project’s yarn weight for final adjustments, and a clean workspace with good lighting. Pro tip: Keep your finishing supplies organized in a dedicated container or crafting bag, ensuring everything is within reach when you’re ready to put the final touches on your masterpiece.
By meticulously gathering these supplies before you begin your finishing process, you set yourself up for success. Each tool plays a specific role in elevating your crochet project from homemade to handcrafted with professional finesse.
Here is a quick reference table summarizing the essential tools and supplies you need for professional crochet finishing, their specifications, and their primary purposes.
| Tool/Supply | Recommended Feature | Purpose |
|---|---|---|
| Scissors | Sharp, precise, fabric-friendly | Cleanly cuts yarn without fraying |
| Yarn Needle | Blunt-tipped, size for yarn weight | Weaving in loose ends |
| Blocking Mats | Foam, interlocking squares | Shaping and setting finished projects |
| Rust-Proof Pins | Stainless steel | Securing pieces during blocking |
| Spray Bottle | Adjustable mist nozzle | Lightly moistens for blocking |
| Measuring Tape | Flexible, clear markings | Ensures precise dimensions |
| Stitch Markers | Removable, visible color | Tracking progress and marking sections |
| Crochet Hook | Matches project yarn weight | Final adjustments and edging |
| Organized Container/Bag | Spacious, easy access | Keeps supplies organized and within reach |
Step 2: Secure Loose Ends Effectively
Securing loose ends is a critical step in transforming your crochet project from an unfinished piece to a polished masterpiece. Weaving in ends might seem like a simple task, but it requires precision and care to ensure your project looks professional and remains durable. The goal is to hide yarn tails seamlessly while preventing them from unraveling over time.
Begin by threading your yarn needle with the loose end, ensuring the tail is long enough to weave comfortably but not so long that it creates unnecessary bulk. Work systematically by weaving the tail through the back side of your stitches, moving in a direction that follows the natural flow of your project’s pattern. For wool or other textured yarns, weave the tail through the backs of several stitches, changing direction slightly to create a zigzag pattern that anchors the end securely. This technique distributes tension and prevents the end from popping out or creating unsightly bumps.
Explore advanced crochet finishing techniques to refine your skills. Different yarn types require slightly different approaches. Synthetic fibers might require a bit more tension when weaving, while natural fibers like cotton can be more forgiving. Always leave a tail of about 4-6 inches to ensure you have enough length to weave effectively. When working with multiple color changes, weave each end immediately after completing that section to keep your work clean and prevent tangling.
Verify your loose end is secure by gently tugging the woven section. It should feel firmly anchored without creating visible distortions in your fabric. If the end feels loose or you can see it peeking through, carefully remove the previous weaving and try again, perhaps using a slightly different angle or weaving through more stitches. Pro tip: Hold your project up to the light after weaving in ends to check for any visible tails or potential weak spots. This extra step ensures a truly professional finish that will withstand washing and regular use. Remember, patience is key in this delicate process of securing your crochet project’s loose ends.
Step 3: Join Pieces Smoothly
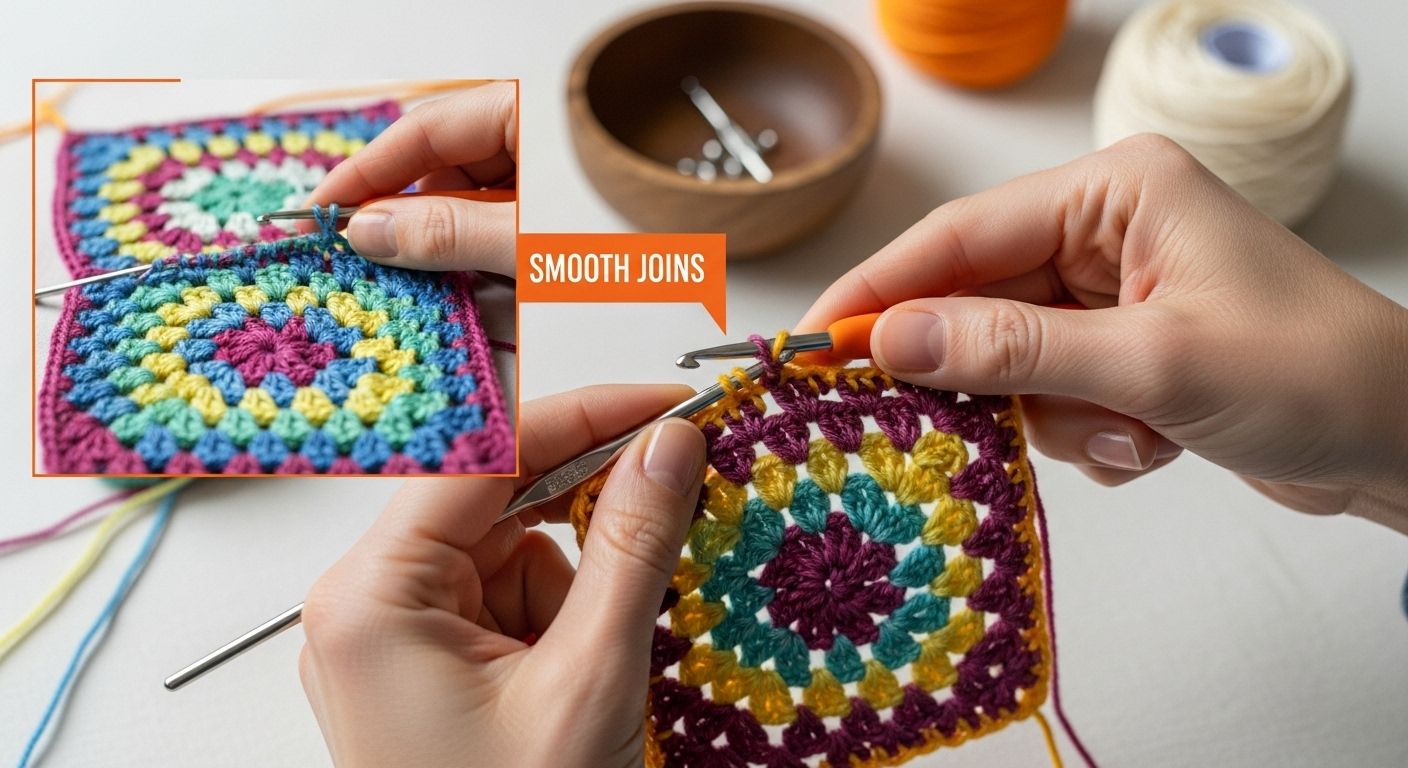
Joining crochet pieces requires precision, patience, and the right technique to create a seamless, professional-looking final product. Smooth joins are the hallmark of an experienced crocheter, transforming individual components into a cohesive and polished project. Whether you’re working on a complex afghan, a delicate garment, or intricate decorative pieces, mastering the art of joining is crucial.
Start by ensuring your pieces are blocked and have consistent tension before attempting to join them. Choose a joining method that complements your project’s style and yarn type. The slip stitch join is perfect for creating nearly invisible seams, especially when using matching yarn colors. When joining, align your pieces carefully, pinning them in place if necessary to maintain precise positioning. Use a yarn needle or crochet hook that matches your project’s yarn weight, which allows for more control and a cleaner finish. Some crafters prefer working from the right side of the project to ensure the most aesthetically pleasing result, while others find working from the wrong side provides more structural integrity.
Discover advanced crochet connection techniques to elevate your project’s finish. Different joining techniques work better for various project types. A mattress stitch works wonderfully for flat pieces like blanket squares, creating an almost invisible seam that lies perfectly flat. For three-dimensional projects, consider using a single crochet join or a slip stitch join that adds subtle texture and strength. When working with multi-colored pieces, strategically choose your joining yarn to either blend seamlessly or create an intentional decorative accent.
To verify your joins are successful, carefully stretch and manipulate the joined section. A well-executed join should be sturdy yet flexible, without creating bulky ridges or gaps. Check that the tension remains consistent and the pieces align perfectly. If you notice any irregularities, gently unwork the join and try again, paying close attention to your stitch placement and tension. Remember that practice makes perfect, and each project offers an opportunity to refine your joining techniques.

Step 4: Apply Edging for a Polished Look
Applying a well-crafted edge transforms an ordinary crochet project into an extraordinary piece of handmade art. Edging is the final flourish that elevates your work from good to remarkable, providing structure, definition, and a professional finish that catches the eye. This critical step requires careful consideration of your project’s overall design, yarn type, and desired aesthetic.
Begin by selecting an edging technique that complements your project’s style and purpose. Simple single crochet edges work wonderfully for clean, minimalist designs, while more intricate shell or picot edges can add dramatic flair to blankets, garments, and accessories. Pay close attention to your tension and stitch count, ensuring the edge lies flat and creates a smooth, consistent border around your entire piece. When working the edge, use a hook size slightly larger than your project’s main body to prevent puckering or unnecessary tightness. This small adjustment allows the edging to flow naturally without distorting the underlying fabric.
Explore advanced crochet finishing techniques to unlock new creative possibilities. Different projects demand different edging approaches. Delicate shawls might benefit from a lightweight, airy picot edge, while robust blankets could showcase a more substantial scalloped or textured border. Consider color choices carefully too—you can either match your project’s main color for a seamless look or introduce a contrasting shade to create visual interest and depth.
To verify your edging is successful, examine the finished border from multiple angles. A perfect edge should appear even, lie flat against the project, and maintain consistent tension throughout. Gently stretch and manipulate the edge to ensure it moves smoothly without buckling or pulling. If you notice any irregularities, carefully unwork the problematic section and rework it, paying extra attention to your stitch placement and yarn tension. Remember that edging is an art form that improves with practice, and each project offers an opportunity to refine your technique and develop your unique creative signature.
Step 5: Block Your Finished Piece for Perfection
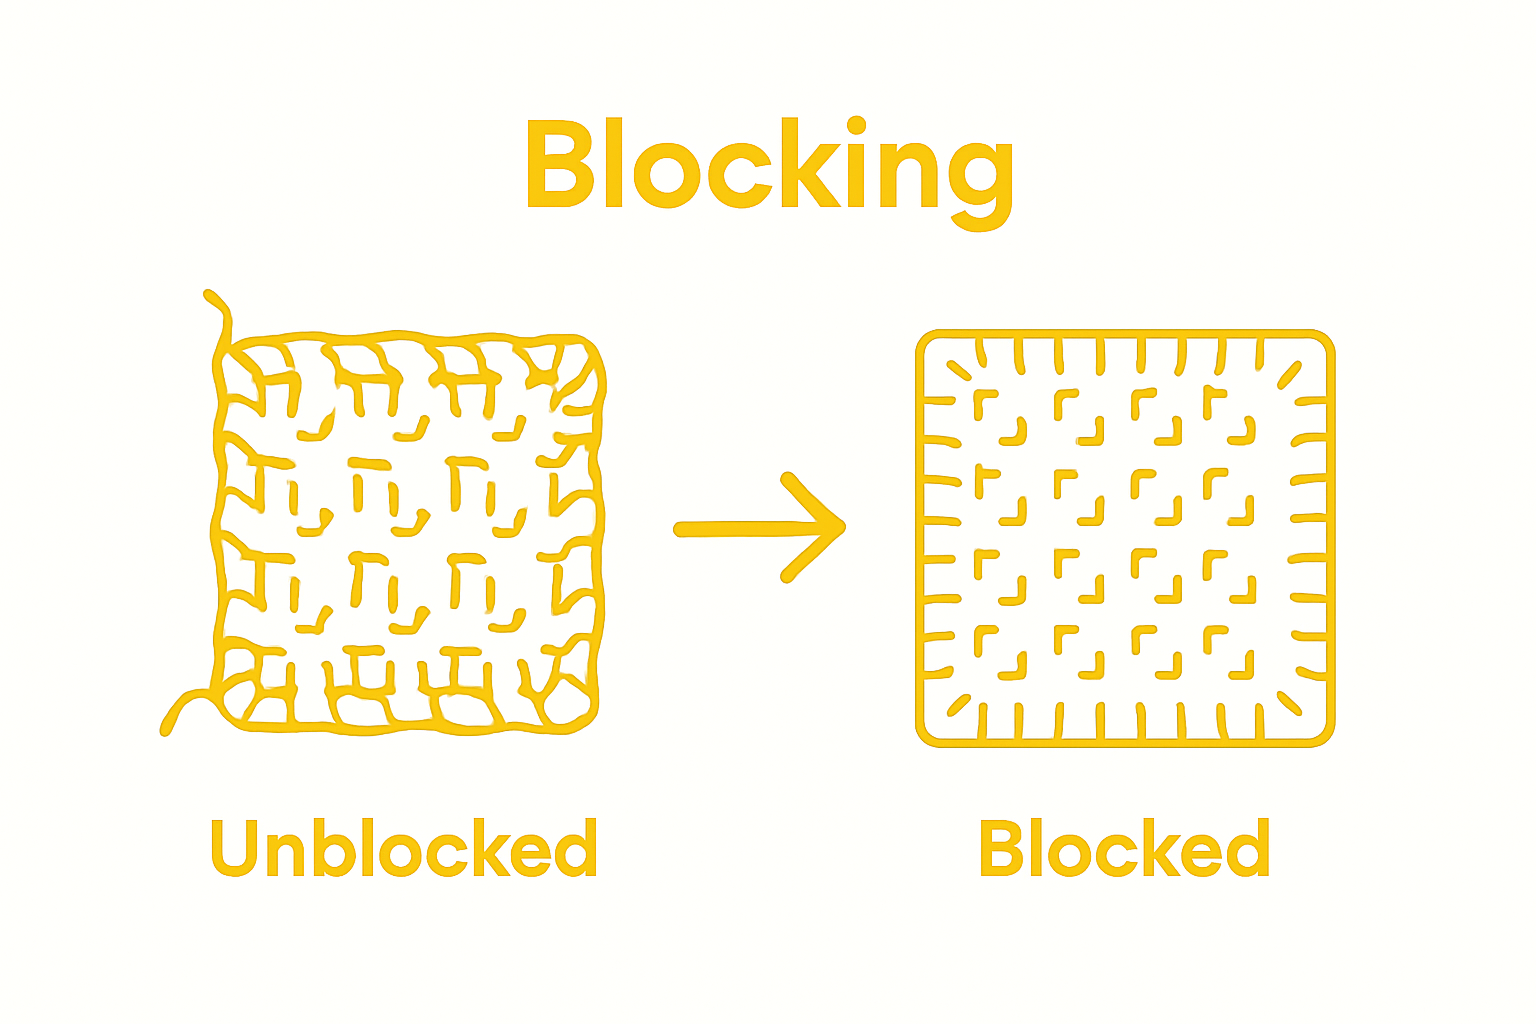
Blocking is the transformative final step that elevates your crochet project from handmade to professional-quality craftsmanship. This crucial technique allows you to shape, stretch, and set your piece precisely, creating clean lines, even stitches, and a polished appearance that showcases your meticulous work. Think of blocking as the ultimate finishing touch that brings your creative vision to life.
Prepare your blocking workspace by selecting an appropriate surface like interlocking foam mats or a specialized blocking board. Different fiber types require specific blocking approaches, so understanding your yarn’s composition is key. For natural fibers like wool or cotton, a light steam or wet blocking method works wonderfully. Synthetic yarns might need a gentler approach with minimal moisture. Begin by carefully washing your piece according to the yarn’s care instructions, then gently squeeze out excess water without wringing, which can distort the fabric. Lay the project flat on your blocking surface, using rust-proof T-pins to secure edges and create your desired shape. Use a measuring tape to ensure symmetry and precise dimensions, pinning strategically to achieve clean lines and eliminate any unwanted rippling or curvature.
Explore advanced crochet finishing techniques to perfect your blocking skills. For lace or intricate patterns, blocking becomes especially critical in opening up delicate stitch work and revealing the full beauty of complex designs. Allow your project to dry completely before removing pins, which might take 24-48 hours depending on humidity and yarn type. Use a spray bottle with water to lightly mist natural fiber projects, helping them relax into their new shape. Pro tip: Photograph your project before and after blocking to appreciate the dramatic transformation. A well-blocked piece not only looks more professional but also drapes more elegantly and maintains its shape during wear and washing.

Elevate Your Crochet Finishing With The Right Tools and Supplies
Dreaming of flawless crochet projects but finding that rough joins, uneven edges, or visible yarn tails are holding you back? As you discovered in our “Master Crochet Finishing Techniques Guide for Perfect Projects,” the secret to professional results lies in every detail from weaving in ends to blocking and edging your work. However, having the right materials on hand is just as essential as perfecting your technique. Imagine reaching the end of a painstaking project only to realize your scissors are dull, your yarn does not match, or your project begs for that perfect polish you just cannot achieve.
Get everything you need for finishing success with our curated Yarn collection, featuring quality fibers in a range of colors and textures. Keep your supplies organized and project-ready with our designer Yarn Bags that make finishing on the go a breeze.
.png)
Ready to turn every project into a masterpiece? Visit CRAFTISS now and experience the difference premium supplies make. Shop today to elevate your crochet game and bring your creative vision to life before your next finishing challenge arrives.
Frequently Asked Questions
What supplies are essential for finishing crochet projects?
To effectively finish crochet projects, gather sharp scissors, yarn needles, blocking materials (like mats and pins), stitch markers, a crochet hook matching the yarn weight, and a clean workspace with good lighting.
How do I securely weave in loose ends on my crochet project?
Thread the yarn needle with a loose end and weave it through the back of stitches, following the natural flow of the project. Use a zigzag pattern for textured yarns, ensuring the end is secure without visible bumps.
What joining techniques can I use for crochet pieces?
Common joining techniques include slip stitch joins for flat seams, mattress stitch for nearly invisible edges on flat pieces, and single crochet joins for added texture on three-dimensional projects. Choose based on your project type and yarn.
How does blocking enhance my finished crochet piece?
Blocking shapes and sets your crochet project, creating clean lines and even stitches. It’s particularly important for lace or intricate patterns, as it helps open up stitches and reveals the design’s beauty.


