

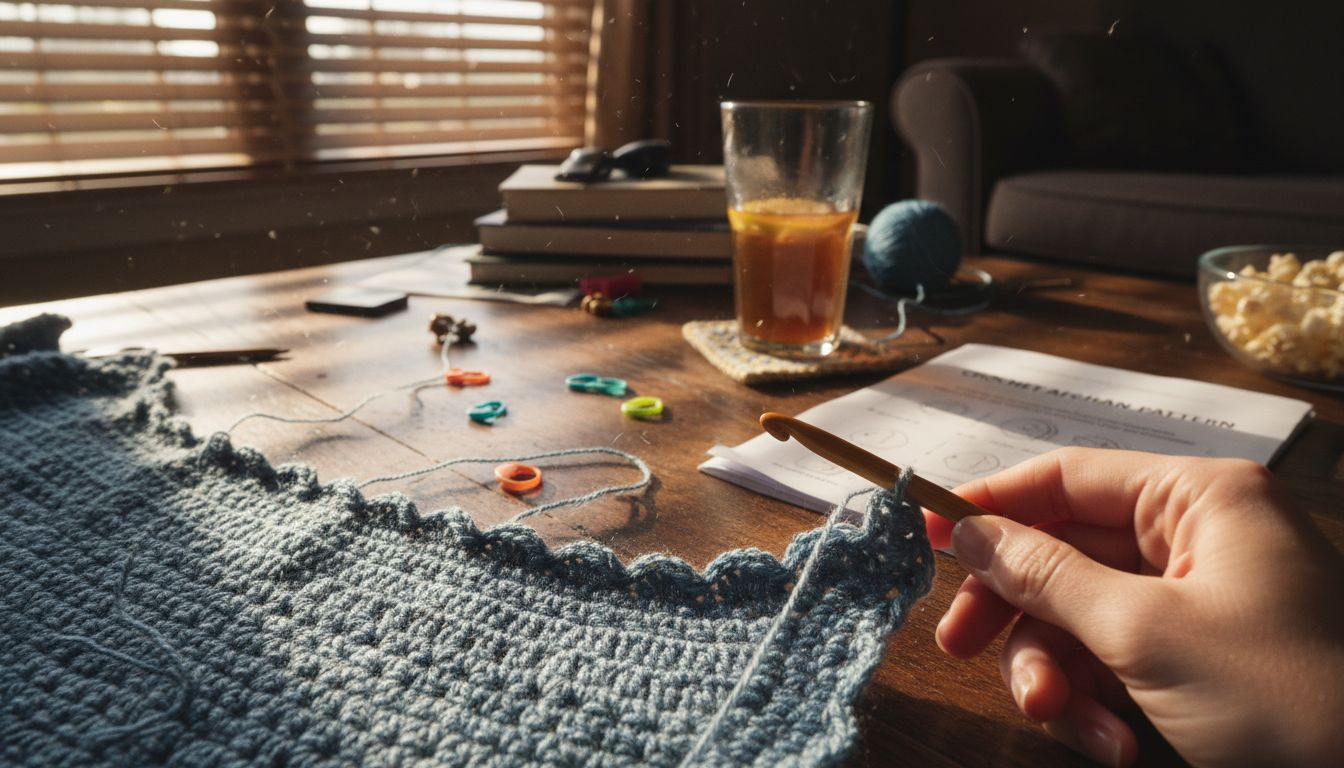
Crochet Border Explained: Elevate Project Finishes
Finishing a crochet piece often leaves crafters searching for that extra touch to make their work stand out. Every detail matters when you want your project to look polished and hold up over time. Adding a crochet border transforms the edges into a decorative frame that adds style and strengthens your creation, bringing both beauty and durability to any blanket, scarf, or home accessory.
Table of Contents
- What Is A Crochet Border And Its Purpose
- Popular Types Of Crochet Borders Explained
- How To Choose Yarn And Hooks For Borders
- Step-By-Step Process For Adding Borders
- Common Crochet Border Mistakes To Avoid
Key Takeaways
| Point | Details |
|---|---|
| Definition of Crochet Borders | Crochet borders are finishing techniques that enhance the aesthetics and structure of crochet projects. |
| Types of Borders | Popular types include scalloped, picot, shell, and ribbed borders, each offering unique visual effects and uses. |
| Yarn and Hook Selection | Choosing the right yarn and hook size is essential for achieving a polished border that complements the project. |
| Common Mistakes | Avoid issues like uneven tension and insufficient edge preparation to ensure a professional-looking finish. |
What Is a Crochet Border and Its Purpose
A crochet border is a specialized finishing technique that transforms ordinary crochet projects into polished, professional-looking pieces. These decorative edgings serve both aesthetic and functional purposes, providing visual refinement and structural reinforcement to your handmade creations. Crochet borders enhance the overall design by adding intricate details and preventing fabric edges from unraveling.
Crochet borders work like a picture frame for your textile art, defining the edges and creating a clean, intentional appearance. They can dramatically elevate a simple project by introducing complex stitch patterns, color variations, or textural elements. Whether you’re working on a blanket, garment, or home decor item, a well-executed border can turn a basic piece into a stunning handmade masterpiece. Borders provide structural support that helps the project maintain its shape during regular use and washing.
The versatility of crochet borders allows crafters to customize their projects in countless ways. Some borders might be simple and understated, using a single uniform stitch, while others can be elaborate and intricate, featuring multiple colors, raised textures, or complex stitch combinations. Borders can also serve practical purposes beyond aesthetics: they can stabilize fabric edges, prevent stretching, and create a more durable finished product.
Pro tip: Experiment with different border styles on scrap yarn before committing to your final project to find the perfect edge that complements your crochet work.
Popular Types of Crochet Borders Explained
Crochet borders come in a fascinating array of styles, each offering unique visual and functional characteristics to elevate your textile projects. Crochet border patterns can be classified into several fundamental types that provide crafters with incredible design flexibility. These border variations range from simple single-stitch edges to complex, multi-dimensional decorative patterns that can transform the entire look of a project.
Some of the most popular crochet border types include scalloped borders, which feature elegant curved edges reminiscent of traditional lace designs, and picot borders that create delicate pointed peaks along the project’s perimeter. Shell borders offer a more textured appearance with rounded, fan-like clusters of stitches, while ribbed borders provide a structured, linear aesthetic that works particularly well on garments and home decor items. Each border type can be customized through color changes, stitch density, and intricate pattern variations.
The selection of a crochet border depends on multiple factors, including the project’s purpose, yarn type, and overall design aesthetic. Understanding crochet edge techniques can help crafters choose borders that not only enhance visual appeal but also provide structural reinforcement. Some borders are purely decorative, while others serve practical purposes like preventing fabric edges from unraveling or adding extra durability to frequently used items like blankets and clothing.
Here’s a summary comparing popular crochet border styles and their typical uses:
| Border Style | Visual Effect | Best Used On | Customization Options |
|---|---|---|---|
| Scalloped | Curved, lacy look | Blankets, shawls | Vary curve size, add colors |
| Picot | Pointed, delicate | Garments, tablecloths | Adjust peak size, spacing |
| Shell | Fan-like, textured | Throws, kids’ items | Alter cluster size or color |
| Ribbed | Linear, structured | Sweaters, home decor | Change rib direction, thickness |
Pro tip: Practice different border techniques on small swatches to understand how various stitch combinations interact with different yarn weights and project types.
How to Choose Yarn and Hooks for Borders
Selecting the right yarn and hooks is crucial for creating professional-looking crochet borders that complement your project’s overall design. The process involves carefully considering multiple factors, including yarn weight, fiber content, and hook size to ensure your border looks beautiful and maintains structural integrity. Beginners should typically start with medium worsted weight yarn and a corresponding 5 mm or 5.5 mm hook, which provides a balanced approach to border creation.
When evaluating yarn for borders, crafters must examine several key characteristics. Fiber type plays a significant role in determining the border’s appearance and durability. Natural fibers like wool and cotton offer different textures and behaviors compared to synthetic alternatives. How to choose yarn becomes especially important when considering factors such as color compatibility, drape, and how the yarn will interact with your project’s existing fabric. The yarn’s twist, thickness, and ply will directly impact the border’s final look and feel.

Crochet hook selection is equally critical in achieving the perfect border. Different hook materials - including aluminum, bamboo, and ergonomic designs - can influence stitch tension and overall comfort during border creation. The hook size must precisely match your chosen yarn weight to ensure consistent stitch definition and prevent unnecessary stretching or bunching. Professional crafters often recommend having a range of hook sizes available to make minor adjustments based on individual project requirements and personal tension style.
Pro tip: Always create a small test swatch with your selected yarn and hook to check border appearance and tension before committing to the entire project.
Use this reference to select yarn and hook features for optimal crochet borders:
| Factor | Recommended Choice | Effect on Border |
|---|---|---|
| Yarn Weight | Medium worsted | Balanced structure, easy handling |
| Fiber Type | Cotton or blends | Crisp edges, good durability |
| Hook Material | Aluminum or ergonomic handle | Consistent tension, comfort |
| Hook Size | 5 mm to 5.5 mm with worsted | Prevents stretch, neat finish |
Step-By-Step Process for Adding Borders
Adding a crochet border requires careful preparation and a systematic approach that transforms an ordinary project into a professional-looking masterpiece. The process begins with thoroughly examining your project’s edges, ensuring they are clean and even before starting the border application. Proper edge preparation involves checking for loose stitches, trimming any stray yarn ends, and creating a smooth foundation that will support your chosen border design.
The actual border application follows a precise sequence of steps. First, select your yarn and hook, ensuring they complement the project’s existing fabric. Joining the yarn is a critical initial step - typically done in a corner stitch using a slip stitch or single crochet technique. As you work around the project’s perimeter, maintaining consistent tension becomes paramount. Crochet border techniques require careful attention to stitch count, especially when navigating corners, which often demand special increases or decreases to prevent bunching or stretching.
Successful border completion involves more than just working stitches around the edge. Advanced crafters pay special attention to corner transitions, ensuring smooth turns that maintain the border’s structural integrity and visual appeal. This might involve using specific techniques like multiple stitches in a single corner stitch or strategically placed increases to help the border lay flat. After completing the border, careful finishing is crucial - this means weaving in loose ends securely, blocking the project if necessary, and checking that the border enhances rather than detracts from the original design.
Pro tip: Count your stitches frequently and use stitch markers at critical points to ensure your border remains consistent and symmetrical throughout the entire project.
Common Crochet Border Mistakes to Avoid
Crochet border mistakes can undermine even the most carefully crafted projects, turning a potentially beautiful finish into a disappointing result. Many crafters encounter common pitfalls that can dramatically affect the border’s appearance and structural integrity. Understanding these potential errors is crucial for creating polished, professional-looking crochet borders that elevate your textile work.
One of the most frequent mistakes involves stitch count and tension. Uneven stitch distribution can cause borders to pucker, wave, or distort, creating an unprofessional appearance. Crafters often struggle with maintaining consistent tension around corners, which requires strategic stitch increases or decreases. Common crochet mistakes frequently stem from not adjusting stitch counts appropriately, leading to borders that either stretch too much or bunch up awkwardly around project edges.
Another critical error is neglecting proper edge preparation and finishing techniques. Failing to weave in ends securely can compromise the border’s durability, while inadequate blocking can result in misshapen or uneven edges. Advanced crafters understand that border success depends not just on the stitching process, but on meticulous preparation and finishing. This includes carefully examining the project’s original edges, selecting appropriate yarn and hook sizes, and executing precise corner transitions that maintain the border’s structural integrity.
Pro tip: Create a small practice border on a test swatch before working on your final project to perfect your technique and identify potential tension or stitch count issues beforehand.
Master Your Crochet Borders with Expert Tools and Quality Yarn
Struggling to achieve that perfect, professional-looking crochet border? Whether you want to add elegant scalloped edges, delicate picots, or structured ribbing, the right materials make all the difference. This article highlighted how stitch tension, yarn choice, and hook size are critical to flawless finishes that elevate your projects and prevent common issues like puckering and uneven edges. At CRAFTISS, we understand these challenges and are here to support your creativity.
.png)
Explore our premium selection of Yarn crafted for consistent quality and durability so your borders look sharp every time. Keep your supplies organized on the go with stylish Yarn Bags designed for crafters who demand both function and flair. Take the next step now and make your crochet borders stand out beautifully by shopping the best tools and materials at CRAFTISS. Perfect your technique with quality you can trust.
Frequently Asked Questions
What is a crochet border and its purpose?
A crochet border is a finishing technique that enhances the appearance of crochet projects while providing structural support. It adds visual refinement and helps prevent fabric edges from unraveling, transforming ordinary pieces into polished creations.
What are the popular types of crochet borders?
Common crochet border types include scalloped borders, which feature elegant curves; picot borders with delicate peaks; shell borders offering textured fan-like clusters; and ribbed borders that provide a structured and linear aesthetic. Each type has unique visual effects and applications.
How do I choose the right yarn and hook for my crochet border?
Selecting the right yarn involves considering yarn weight, fiber content, and colors that complement your project. For hooks, the size should correspond to the yarn weight to ensure consistent tension. Often, medium worsted weight yarn and a 5 mm or 5.5 mm hook are recommended for beginners.
What are some common mistakes to avoid when adding a crochet border?
Common mistakes include uneven stitch distribution and inadequate edge preparation. Failing to maintain consistent tension can cause puckering or distortion. Additionally, neglecting proper finishing techniques, like weaving in ends securely, can compromise the border’s durability.
Recommended
- Understanding Crochet Edge Techniques for Every Project – CRAFTISS
- Master Crochet Finishing Techniques Guide for Perfect Projects – CRAFTISS
- What Is Reverse Crochet and Why It Matters – CRAFTISS
- What is Double Crochet? Understanding this Essential Stitch – CRAFTISS


