

How to Make Crochet Amigurumi: A Step-by-Step Guide
Crocheting amigurumi has taken the crafting world by storm with its adorable, three dimensional figures. You might think it takes years to master these tiny stitched wonders, but even beginners can create impressive pieces with the right tools and know-how. In fact, almost 70 percent of new crafters report finishing their first amigurumi in less than a weekend. Most people expect this to be a slow, complex process, but the secret lies in some simple steps and clever techniques that make the whole journey much more fun than you’d guess.
Table of Contents
- Step 1: Gather Your Crochet Supplies
- Step 2: Choose An Amigurumi Pattern
- Step 3: Crochet Your Amigurumi Pieces
- Step 4: Assemble The Amigurumi
- Step 5: Add Details And Finishing Touches
- Step 6: Verify The Final Product
Quick Summary
| Key Point | Explanation |
|---|---|
| 1. Use a small crochet hook | A hook size between 2.0mm to 3.5mm is ideal for tight stitches needed for amigurumi work. |
| 2. Choose lightweight yarn | Opt for worsted or sport weight cotton or acrylic, as these provide structure for defined shapes. |
| 3. Select patterns suited for your skill level | Begin with beginner-friendly patterns for a smoother learning experience and to build confidence. |
| 4. Master the magic ring technique | This technique creates a tight, seamless start for your amigurumi, preventing gaps in the design. |
| 5. Verify assembly and finishing details | Ensure all pieces are securely attached and check symmetry for a polished final product. |
Step 1: Gather Your Crochet Supplies
Beginning your amigurumi journey starts with selecting the right tools and materials. Unlike traditional crochet projects, amigurumi requires precision and specific supplies to create adorable three dimensional crocheted figures. Crafters will need a focused collection of tools that support the intricate work required for these miniature textile sculptures.
Essential Crochet Tools for Amigurumi
The foundation of successful amigurumi creation lies in selecting appropriate materials. You will need a small crochet hook typically ranging between 2.0mm to 3.5mm, which allows for tight, compact stitches essential in creating small, sturdy figures. Opt for hooks with smooth, inline heads that enable consistent tension and prevent yarn splitting. Aluminum or ergonomic hooks with comfortable grips can help reduce hand fatigue during extended crafting sessions.
Choosing the right yarn weight is equally crucial. Amigurumi works best with lightweight, smooth yarn like worsted weight or sport weight cotton or acrylic blends. These yarns provide structure and allow you to create crisp, defined shapes. Avoid fuzzy or textured yarns that can obscure your stitches and make detailed shaping challenging. Learn more about selecting the perfect yarn for your projects.
Additional supplies you will need include:
- Fiberfill stuffing for creating volume in your amigurumi
- Stitch markers to track round beginnings
- Sharp scissors for precise yarn cutting
- Yarn needle for weaving in loose ends
Preparing your workspace with good lighting and a comfortable seating arrangement will also contribute to an enjoyable crafting experience. Remember that patience and practice are your most important tools when learning how to make crochet amigurumi.
Step 2: Choose an Amigurumi Pattern
Selecting the right amigurumi pattern is a critical step that determines the success and enjoyment of your crafting experience. Your pattern choice will influence everything from the complexity of stitches to the final appearance of your textile creature. Learn more about the fascinating world of amigurumi, understanding its nuances can help you make an informed decision.
Recommended supplies for your project


Understanding Pattern Complexity
Amigurumi patterns range from beginner friendly designs to intricate, advanced projects that challenge even experienced crocheters. For first time creators, simple geometric shapes like spheres, cylinders, and basic animal forms provide an excellent starting point. These patterns typically involve minimal color changes and straightforward stitch techniques. Look for patterns labeled as “beginner” or “easy” that include clear, step by step instructions with accompanying images or video tutorials.
When evaluating a pattern, pay close attention to several key factors. The skill level indication is crucial - most patterns will specify whether they are suitable for beginners, intermediate, or advanced crafters. Check the required materials list to ensure you have compatible yarn weights, appropriate hook sizes, and any specialized tools mentioned. Detailed patterns will include stitch counts for each round, helping you track your progress and maintain consistent sizing.
Recommended pattern selection criteria include:
- Clear, photographed step by step instructions
- Skill level matching your current experience
- Reasonable number of color changes
- Comprehensive material requirements list
- Availability of online video support
Remember that choosing a pattern is not just about difficulty but also about personal connection. Select a design that genuinely excites you, whether it is a cute animal, a whimsical character, or a decorative object. Your enthusiasm will fuel your learning and make the crafting process more enjoyable.
Step 3: Crochet Your Amigurumi Pieces
Crocheting amigurumi pieces requires precision, patience, and consistent technique. This step transforms your selected pattern into three dimensional textile magic, creating the foundation for your adorable figure. Discover essential tips for crochet success to support your crafting journey and improve your skills.
Mastering Fundamental Techniques
Most amigurumi patterns begin with a magic ring technique, which creates a tight, seamless circular starting point for your piece. Unlike traditional crochet methods, the magic ring allows you to pull the center completely closed, preventing unsightly gaps.
Start by creating a loop with your yarn, then work your initial stitches directly into this loop. After completing the required number of stitches, gently pull the yarn tail to cinch the ring closed, creating a perfect circular foundation.
Working in continuous rounds is another critical technique for creating smooth, professional looking amigurumi pieces. Unlike traditional crochet where you might join and chain between rounds, amigurumi requires an uninterrupted spiral of stitches. Use a stitch marker to track the beginning of each round, preventing confusion and ensuring consistent stitch count. Maintain even tension throughout your work, which means applying consistent pressure while crocheting. Uneven tension can cause your pieces to look lumpy or misshapen, potentially compromising the final design.
Key considerations while crocheting amigurumi pieces include:

- Count stitches carefully in each round
- Use smaller hook sizes for tighter stitches
- Check pattern instructions for specific stitch requirements
- Pause and adjust tension if stitches look uneven
- Compare your work periodically with pattern images
Remember that practice creates muscle memory. Your first few pieces might look imperfect, but each project improves your skill and understanding of amigurumi construction techniques.
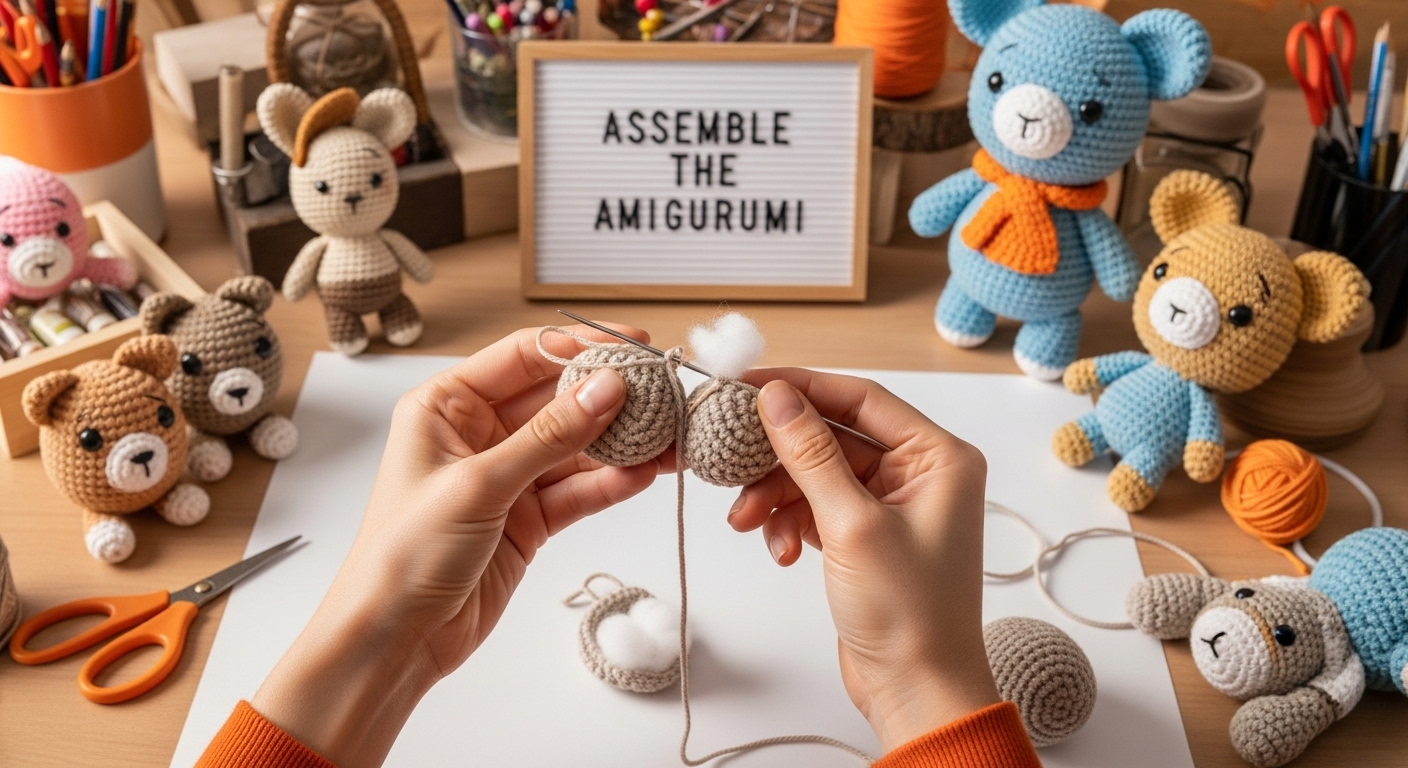
Step 4: Assemble the Amigurumi
Assembling your amigurumi transforms individual crocheted pieces into a charming three dimensional character. This critical stage requires patience, precision, and careful planning to ensure your textile creation comes together seamlessly. Successful assembly depends on understanding how different components connect and maintaining consistent tension throughout the process.
Connecting Pieces with Precision
Begin assembly by dry fitting your crocheted pieces before permanent attachment. This preliminary step allows you to visualize the final design and make necessary adjustments. Use stitch markers or safety pins to temporarily hold pieces in place, helping you understand their optimal positioning. Your yarn needle becomes the most important tool during this phase, allowing you to create nearly invisible seams that maintain the smooth aesthetic characteristic of high quality amigurumi. Explore finishing techniques that elevate your crochet projects to enhance your overall crafting skills.
Stuffing represents another crucial aspect of assembly. Fiberfill should be added gradually and evenly, preventing lumps or uneven areas that could distort your amigurumi’s shape. Use small amounts of stuffing, pressing gently to distribute it uniformly throughout each piece. When attaching limbs or additional features, insert your yarn through the back loops of both pieces to create a strong, nearly invisible connection. Secure each attachment with multiple stitches, ensuring the piece will withstand handling and maintain its structural integrity.
Critical assembly checkpoints include:
- Verify piece alignment before permanent attachment
- Distribute stuffing evenly without overstuffing
- Use matching yarn color for seamless connections
- Weave in loose ends securely
- Check overall symmetry and proportions
Remember that practice improves your assembly skills. Each amigurumi you create will look more polished and professional as you develop muscle memory and technique.
Step 5: Add Details and Finishing Touches
The final stage of creating an amigurumi transforms your crocheted piece from a simple textile figure into a character with personality and charm. Adding details requires a delicate touch, precision, and creative vision that brings your handmade creation to life. Master the art of crochet finishing techniques to elevate your crafting skills and create professional looking pieces.
Crafting Expressive Features
Embroidery and surface crochet techniques become your primary tools for adding intricate details. Select embroidery floss or thin yarn that complements your amigurumi’s base color, ensuring clean and precise lines for facial features like eyes, nose, and mouth. French knots work wonderfully for creating small, rounded eyes, while simple backstitch techniques can define mouths and add subtle expression. When positioning facial features, symmetry is crucial. Use stitch markers or temporary pins to test placement before making permanent stitches, ensuring your amigurumi looks balanced and intentional.
Accessories and additional textural elements can dramatically enhance your amigurumi’s character. Small crocheted additions like miniature hats, scarves, or decorative elements provide opportunities for personalization. Secure these additional pieces carefully, using the same yarn used in the original piece to create nearly invisible attachments. Pay attention to scale and proportion, ensuring any added elements complement rather than overwhelm your amigurumi’s overall design. Careful placement and subtle detailing can transform a simple crocheted figure into a unique, storytelling piece.
Key considerations for adding details include:
- Use sharp, small scissors for precise trimming
- Select embroidery colors that complement base yarn
- Test feature placement before permanent stitching
- Maintain consistent tension in surface embroidery
- Trim loose threads carefully to maintain clean appearance
Remember that patience and practice are your greatest allies in creating beautifully detailed amigurumi. Each piece you create will showcase growing skill and artistic expression.
Step 6: Verify the Final Product
Verifying your amigurumi represents the culmination of your creative journey, transforming hours of careful crafting into a final, tangible piece. This critical evaluation step ensures your textile creation meets both technical standards and your personal artistic vision. Learn more about perfecting your craft projects to enhance your overall crafting skills.
Comprehensive Quality Assessment
Structural integrity forms the foundation of your verification process. Examine each component of your amigurumi carefully, checking for consistent stitch tension, secure attachments, and balanced proportions. Gently manipulate the figure to test joint stability and overall durability. Pay special attention to areas where different pieces connect, ensuring seams are tight and smooth without visible gaps or loose threads. A high quality amigurumi should maintain its shape when held or posed, with limbs and features remaining firmly in place.
Visual and tactile inspection reveals subtle details that distinguish an exceptional amigurumi from an average creation. Scrutinize facial features and decorative elements, checking for symmetry and precise placement. Run your fingers carefully over the surface, feeling for any uneven stitches or loose yarn segments. Color consistency matters tremendously your chosen yarn should appear uniform, with no unexpected variations that might distract from the overall design.
Below is a checklist table summarizing key verification steps to help ensure your amigurumi project is polished and complete.
| Verification Step | What to Look For | Why It Matters |
|---|---|---|
| Secure Attachments | All pieces firmly joined; no loose parts | Guarantees durability and longevity |
| Consistent Stitch Tension | Even stitches throughout the figure | Prevents uneven texture or shape |
| Symmetrical Features | Balanced placement of facial and decorative elements | Ensures aesthetic balance |
| Structural Stability | Figure holds shape when handled | Maintains intended appearance |
| No Visible Yarn Ends | All threads neatly woven in or trimmed | Creates a professional, clean look |
Key verification checkpoints include:
- Confirm all pieces are securely attached
- Check for consistent stitch tension throughout
- Verify facial features are symmetrical
- Test structural stability by gentle manipulation
- Ensure no loose threads or yarn ends remain visible
Remember that each amigurumi is a unique artistic expression. Minor imperfections often add character and showcase the handmade nature of your creation, transforming technical precision into a truly personal craft experience.
Ready to Crochet Your First Amigurumi? Find the Right Tools with Craftiss
If you are excited to turn your beginner amigurumi project into a success but are struggling to find the perfect yarn and accessories for precise, cute results, you are not alone. Many crafters face the challenge of choosing materials that bring their vision to life while achieving clean shapes and sturdy finishes. Craftiss helps make this process effortless. Explore our wide collection of yarn selections tailored for amigurumi, so you never have to compromise on quality or color variety.
.png)
Transform your learning into creating with confidence. Visit https://craftiss.com to browse essential supplies, discover themed merch for crochet lovers, and start your next amigurumi with the best resources. Shop today and give your handmade creations the exceptional finish they deserve.
Frequently Asked Questions
What supplies do I need to start making crochet amigurumi?
To begin your amigurumi journey, you’ll need a small crochet hook (2.0mm to 3.5mm), smooth lightweight yarn (like worsted or sport weight cotton), fiberfill stuffing, stitch markers, sharp scissors, and a yarn needle for weaving in ends.
How do I choose the right amigurumi pattern for beginners?
Look for amigurumi patterns labeled as ‘beginner’ or ‘easy’ that involve simple geometric shapes and minimal color changes. Patterns should have clear, step-by-step instructions and include images or video support for clarity.
What techniques are essential for crocheting amigurumi pieces?
Key techniques include starting with a magic ring for a tight foundation, working in continuous rounds to avoid seams, and maintaining even tension throughout your work to ensure consistent stitch quality.
How can I ensure my assembled amigurumi looks polished and professional?
To achieve a polished look, dry fit your pieces before permanently attaching them, stuff evenly, and use a yarn needle for secure, nearly invisible seams. Pay attention to detail when adding features, ensuring symmetry and careful placement.
Recommended
- How to crochet with yarn: your ultimate beginner’s guide to mastering – CRAFTISS
- What is Amigurumi? Understanding the Art of Crochet Toys – CRAFTISS
- 8 Essential Beginner Crochet Tips for Success – CRAFTISS
- How to Make Granny Squares: A Beginner’s Guide – CRAFTISS
